2.28.2010

Chocolate Chip Cupcakes for Chip


Last week, our friend Chip installed new flooring in our kitchen. It was much needed, and much appreciated. As thanks {as if it would be adequate to my appreciation} I made Chip some cupcakes. Actually, I made Chocolate Chip Cupcakes for Chip. ha!

Really it is quite simple to make. Today I wasn't feeling my best {stress, fatigue} so I took shortcuts. All you need for the cupcakes is a box of yellow cake mix, the stuff the box asks for, and a cup of chocolate chips. If I were you, I'd use mini chips, because I used the regular size and they happened to sink to the bottom. Not cool. Better "luck" next time.

What really brought my mood up, though, was the way my frosting turned out! I've always had a problem with my frosting, but today... today I dare say that it was perfect!

Here's the recipe for the frosting:

12 ounces (3 sticks) unsalted butter, softened
1 pound confectioners' sugar, sifted
1/2 teaspoon pure vanilla extract

Directions
- Beat butter with a mixer on medium-high speed until pale and creamy, about 2 minutes.
-Reduce speed to medium.
-Add sugar, 1/2 cup at a time, beating after each addition, about 5 minutes. (After every 2 additions, increase speed to high, and beat for 10 seconds, then reduce speed to medium-high). Add vanilla, and beat until buttercream is smooth. Use immediately, or cover and refrigerate for up to 3 days. (Bring to room temperature, and beat on low speed until smooth before using.)
Martha's Basic Buttercream

And to make it chocolate chip icing, just mix in two cups of semi-sweet chocolate chips.


I used a couple of ways to soften my butter. The first stick I used a roller with the butter between two sheets of wax paper. This was all good and well until I had to peel it off of the wax paper. The second trick I used was to stick the sticks in the microwave for 14 seconds. That worked better. I did that for my remaining two.


Beaten Butter.


My fluffy {for once!} frosting!

After you've got all that done, frost your cupcakes. It may not turn out super smooth, but it still looks nice and tastes even better!


And here's my trial cupcake.... are you ready for this?


Oh, it was fantastic.

Tell me if you try it!
2.26.2010

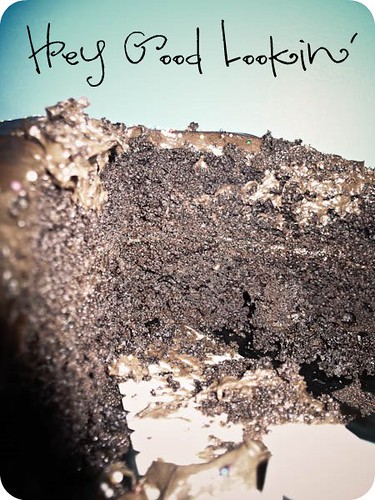
Three Cheers for Cheerwine Cake!

UPDATE: We had the cake last night. Was it absolutely fantastic?


Oh yeah. It really, really was. So rich. Like, extremely rich. Next time, I think I will do Vanilla Extract instead of Almond, though.

_________________________________________________

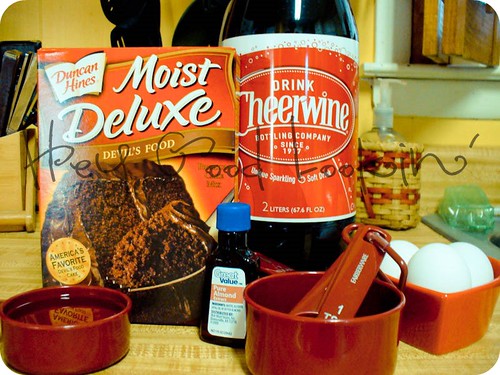
Do you like Cheerwine? {Note: it has nothing to do with alcohol; we don't drink alcohol in our family} If you like Cheerwine, you'll be interested to know that there is a Cheerwine cake. Don't worry about Googling {or swagbuck'ing - as I tend to do} the recipe - I have it right here for you!


You'll need:
1 box devil's food cake
1 cup Cheerwine soft drink
1 tsp. almond extract

Mix as directed on box {with eggs and oil} but use Cheerwine instead of water. Add almond extract. Bake as directed on box.

And don't forget to grease your pan. {Like someone I know did...}


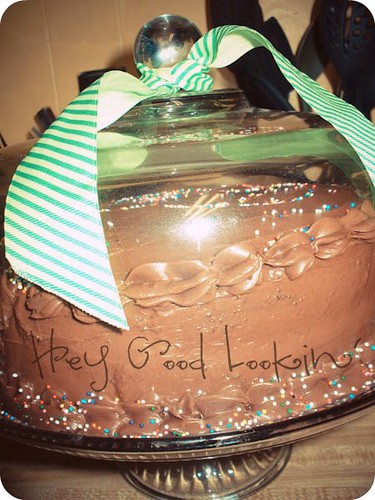
There's also a Cheerwine frosting recipe, which I made and did not like, so instead I used good old Betty Crocker icing.

Let's just take a break to note this: I hate baking cakes. I love cupcakes. I hate cakes. I hate even more putting frosting on cakes. Perhaps I just need to do it more so I'll like it more... ahh, well... anyway...


This is my first time ever actually "decorating" a cake.


Can you tell?


We haven't eaten it yet! I'll tell you how it turns out.

Tacer Salad

So last night I felt like cooking, but I didn't feel like cleaning up a huge mess. And honestly that usually goes hand in hand with me, because I'm a dunce when it comes to cooking. However, I was actually able to throw something together without upsetting my {newly floored} kitchen all too much! I threw together a simple, tasty taco {or, tacer if your from these parts... yes, we have heard that here!} salad!

Here's what I used:
1 lb Ground Turkey {you can use ground beef if you want. we like turkey because it is lean and tasty!}
1 can rotel
1 can sweet yellow corn
a squirt (seriously) of ranch dressing
a handful of grated cheddar cheese
a sprinkling of homemade taco seasoning {I don't know what's in it! Hubby made it}
tortilla chips {we used the remnants of three bags}

I would have loved to throw some black beans in there, but we didn't have anything like that. Maybe you could add some if you would like to try it? We just had:


{it still tasted fine}

Anyway. Here's what you do.

First things first, heat your oven to 350.

Brown your {turkey/beef} meat and sprinkle that taco seasoning on top. Turkey meat cooks out all the grease so you don't have to drain it. Put that in a bowl.

Drain your rotel and corn. Put that in the bowl with the taco meat and mix it all up.

Take your chips, crush them, and put them in a different bowl. Or the same bowl. You know, whatever.

Put the meat mix in with the chips and mix that up. Throw in some cheese if you feel like it, and squirt a bit of ranch dressing on there. Then you pull out your 9x13 pan {mine is glass} and spread it all out in there. Sprinkle more cheese on top. Stick it in the oven. Pull it out once the cheese is all melted!

And there you go!


Ole!

Oh, and just so you know, it doesn't taste as good left over, so if you're not going to eat it all... don't make as much! ha!

Enjoy!

Nun's Puffs

I got bored yesterday and decided that I would bake something. This is possibly a bad habit to get into. Baking when bored. Especially as most of what I bake probably aren't the best things to eat when you're trying to lose weight or shape up. Anyway, I pulled out my Better Homes and Gardens cookbook and found a really simple and easy recipe. Would you like to know how to make this?:


yum. It's called "Nun's Puffs".

And here's what you'll need:

1/2 Cup Butter
1 Cup milk
3/4 cup all-purpose flour
4 eggs
1 tablespoon sugar
Honey (optional)

And here's what you do:

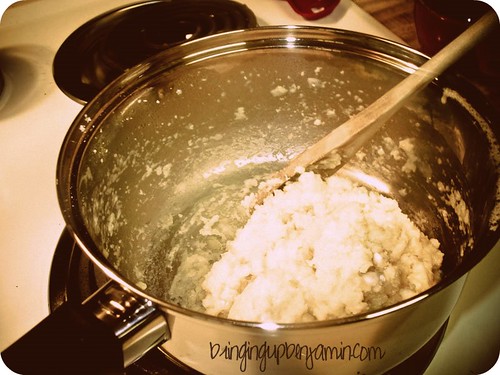
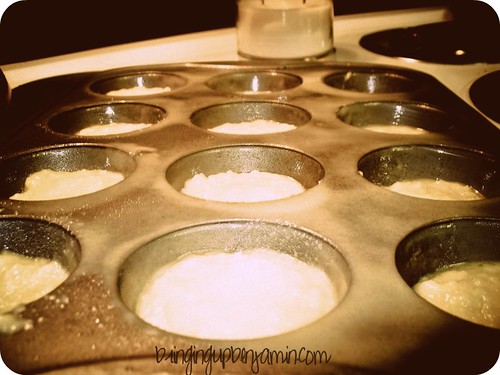
1. Preheat oven to 375F. Generously grease twelve 2 1/2-in muffin cups, including the edge and around the top of each cup (I used Baking Pam); set aside. In a medium saucepan, melt butter; add milk. Bring to boiling. Add flour all at once, stirring vigorously. Cook and stir until mixture forms a ball that does not separate. Remove from heat; cool for 5 minutes.


2. Add the eggs, one at a time, beating for 1 minute with a wooden spoon after each addition or until smooth. Divide dough evenly among prepared muffin cups, filling cups about two-thirds full; sprinkle with sugar.


3. Bake about 30 minutes or until golden brown and puffy. Remove from pan. Serve immediately. If desired, serve with honey.


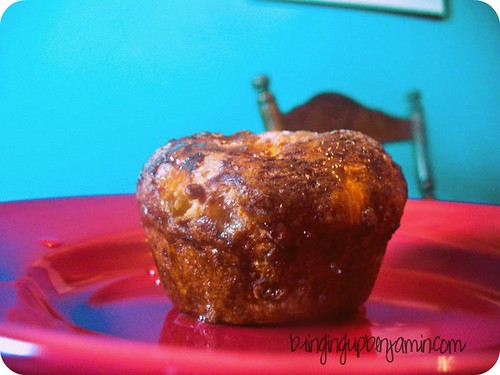
And you bet that honey was desired. Well, for Hubby's. We ran out of honey so I put syrup on mine and it was fantastic. You can just see the honey dripping off of that puff... oh yes, I went there.

Mine turned out tasting rather eggy, so I think these would be absolutely glorious for breakfast.


Mmmmm....

Benjamin's Waffles

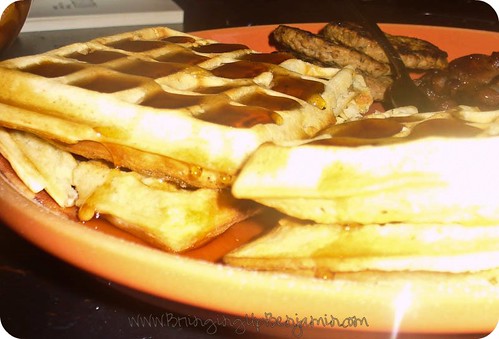
Do you like waffles?! I love waffles! I used to eat the Eggo Waffles nearly every day! And for Christmas I received a waffle iron of my own, so not too long ago, we decided we'd give it a go. One of our favorite things to have for dinner is breakfast. So easy and inexpensive, and who doesn't love stuff drenched in syrup?! Yeah, that's what I thought!

Of course, Benjamin can't eat regular waffles as he is allergic to eggs. We like to make things that he can eat with us, since we all eat at the same time and Benjamin likes to do that little number where he reaches and oops! His hand just so happens to land in your plate, and he may as well go ahead and grab what he's touched. It always reminds me of the typical guy in the movie theater with his girlfriend, the yawn and stretch and oops! My arm's around your shoulders!

Anyway. I tried to do waffles from my eggless baking book, but that didn't end so pretty. Instead, I just took a regular waffle recipe and switched it up a bit so Benjamin could eat it.

We can call these "Benjamin's Waffles".

This is what you'll need:

1 3/4 cups all-purpose flour
2 tablespoons sugar
1 tablespoon baking powder
1/4 teaspoon salt
1 cup applesauce (substituting the eggs)
1 3/4 cups milk
1/2 cup oil or butter, melted
1 teaspoon vanilla

1. Mix it all together.
2. Pour it onto your waffle grids. I used I think a cup of batter for each grid. Don't forget to use Pam on there, or your waffles may stick and be a real pain to get up.
3. Close the lid, and wait. I suppose it depends on what sort of waffle iron you use, but ours were done with the steam stopped coming out of the sides.
4. Take 'em off.
5. Repeat steps 1-4 until you've used up your batter...
6. Serve warm with butter and syrup if you'd like! You can even toss some fruit on there!


Of course, Ben's did not have syrup or anything on it. He ate his plain. But he still liked it! They tasted sort of like vanilla wafers.

Ta-da!

Mexican Fiesta Soup!

Despite the fact that I am an absolute terror in the kitchen, I have really felt the desire to cook lately. Usually hubby is the cook in our family, which is wonderful because he enjoys it and usually I don't. However, last night I asked if I could make the spaghetti and today I took it upon myself to cook the mexican fiesta soup that we will be having at our Lost party! I wanted to go ahead and share the recipe with you because it is so easy and so inexpensive and SO yummy!

This is what you'll need:


Your crock pot!


One can each of the following:
Pinto Beans
Black Beans
White Corn
Golden Corn
Rotel

Fritos
Sour cream (optional)
Cheese (optional)
And 1lb of ground beef, though we used ground turkey this time (for the first time)

Start off by browning your turkey or beef, whichever you prefer, in a pan. Make sure it's good and brown. I added a little bit of homemade taco seasoning just for a bit of taste, but you can leave that out. After all that is done, drain it, and open up your cans and dump it all in your crock pot. You can leave out the fifteen to thirty minutes I spent wrestling with two can openers, dumping corn juice on the floor, splashing myself with the juice... ahem... like I said, I am a total wreck in the kitchen.


Let it heat up for a while in your crock pot. We like to serve ours on top of Fritos. I put cheese on mine and Hubby puts cheese and sour cream.

Voila! Enjoy! And let me know what you think if you decide to try it out!

Perfect Chocolate Cupcakes, without the eggs!


When we found out that Benjamin had egg allergies, I was very concerned about how I was going to let him have a typical birthday party and allow him to have his own cake (cupcake) to enjoy. I knew that people did have recipes without eggs in them and with substitutes such as applesauce or bananas. But I really didn't want to use those ingredients, and I didn't know where to start. That is, until a good friend sent me a cookbook for my birthday: Bakin' Without Eggs. The perfect cupcake recipe was therein, and now I am going to share it with you! Aren't you excited?!


Perfect Chocolate Cupcakes

Cake Batter Ingredients
1 2/3 Cups unbleached all-purpose flour
1 1/4 cup granulated sugar
1/2 cup cocoa powder
1 tablespoon baking soda
1 cup sour cream or no-fat sour cream (I just used regular)
1/2 cup oil or apple juice (I used oil)
2 teaspoons vanilla extract
1/2 cup club soda

Frosting Ingredients
3 cups confectioners' sugar
1/2 cup cocoa powder
1/2 cup margarine, room temperature
1 teaspoon vanilla extract
1/4 cup milk


1. Preheat oven to 350*F. Lightly butter 12-cup (4-ounce) muffin pan. (I used cupcake cups)
2. To prepare cake: In a large bowl, with a handheld electric mixer set on medium speed, beat flour, sugar, cocoa, baking soda, sour cream, oil or apple juice, vanilla, and club soda for 3 minutes or until completely mixed.
3. In prepared pan, fill 12 muffin cups 3/4 full. Bake for 15 to 20 minutes. Cool on wire rack approximately 20 minutes before removing from pan.
4. To prepare frosting: Meanwhile, in a medium bowl, beat together confectioners' sugar, cocoa, margarine, vanilla, and milk with a handheld electric mixer set on medium speed for 3 minutes or until creamy. Frost cupcakes.


Notes: Extra frosting will keep in refrigerator up to 2 weeks; This cupcake will also freeze well, and the frosting is perfect!

The book says that it will make up to 12 cupcakes, but we were able to get 23 out of this recipe! And they were very, very good!


Enjoy!

When Life Gives You Lemons

When life gives you
12 lemons
10-12 tbs of sugar
and 12 cups of water:


prepare to make an amazing beverage! (but you don't have to drink it out of a baby bottle!)


squeeze those lemons!


forget about your unwashed, post-nap hair and let your hubby take pictures - how often do you make homemade lemonade anyway?!


put elbow grease into it!


mix everything together in a beautiful pitcher/sun tea jar (this one was $5 at Walmart)...


Then blog about it!

Right out of Peach Country...


WORLD'S LARGEST PEACH COBBLER
75 Gallons slice fresh Georgia Peaches
150 pounds of self-rising flour
150 pounds of sugar
32 gallons of milk
90 pounds of butter
Divide self-rising flour, sugar and milk into six equal parts and pour into six clean trashcans. Mix thoroughly with clean boat paddle. Sizzle 90 pounds of butter in a 5 ft. x 11 ft. baking pan six inches deep. Pour in batter then add 75 gallons of sliced peaches. Bake at 350 degrees for about four hours until golden brown. If you can't get fresh or fresh frozen peaches, you better be prepared to open a lot of giant cans of peaches.


Seriously folks, that is the recipe. Yes, you saw correctly. Trashcans. Boat paddle. Yes.

But, if you're not entertaining quite that large a crowd, or if you don't plan on eating peach cobbler for the next five years, try this recipe:

QUICK AND EASY PEACH COBBLER
2 cups sliced fresh Georgia peaches
1 cup self-rising flour
1 cup sugar
1 cup milk
1 stick of butter
Mix together 1 cup self-rising flour, 1 cup sugar and 1 cup milk. Melt butter in microwave oven and pour into empty disposable baking pan. Be sure butter is sizzling and then add batter mixture and top with fresh peaches. Bake at 350 until golden brown. If you can't get fresh or frozen peaches, use one large can of Georgia peaches.


There you have it. If you need more peach recipes, visit www.GAPeachFestival.com.

testing, testing

test post.

this is just a test. this is going to be my recipe blog. aren't you excited? I am! yes, I am!!